AddThis

Sunday, September 25, 2016

How to Setup a Cowrie SSH Honeypot

Cowrie is a medium interaction SSH and Telnet honeypot, which can log brute force attacks and an attacker's shell interaction. Cowrie is an excellent project developed by Michel Oosterhof.

This post provides instructions on how to configure a Cowrie SSH honeypot on an Ubuntu 16.04 system. I recommend that you configure Cowrie on a cloud server instance rather than a host on your home network.

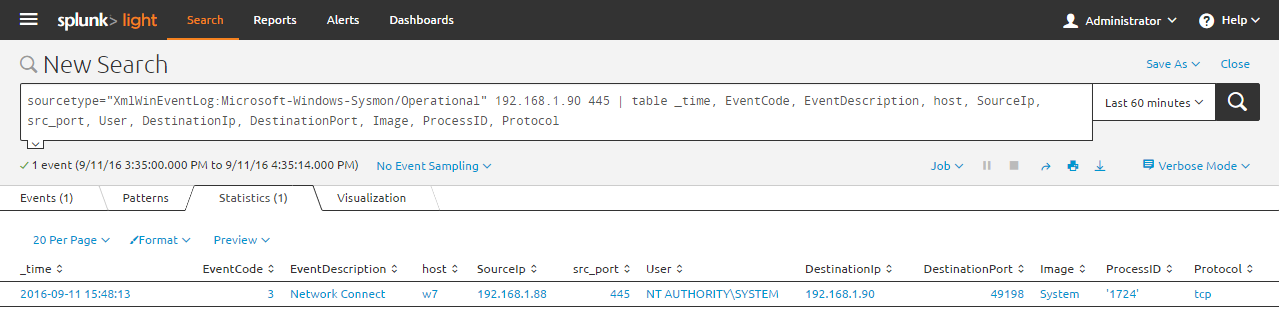
I will publish another post soon to show how to visualize the attacker's activity in Splunk.

Change the Port You Will Use to Administer the Server

Cowrie will be listening for SSH connections on port 22. You'll want to configure the SSH service to listen on a different port for you to connect to and administer the server.

sudo vi /etc/ssh/sshd_config

Under "# What ports, IPs and protocols we listen for", change the port number to 3393 or your preferred port number.


Write your changes and quit vi.

Ctrl + C

:wq

Restart the SSH service.

service ssh restart

By running the command below, you can see that the server is now listening for connections on port 3393.

netstat -tan
Proto Recv-Q Send-Q Local Address           Foreign Address         State
tcp0      0 0.0.0.0:3393            0.0.0.0:*               LISTEN

Install and Configure Cowrie

Download updated package lists.

sudo apt-get update

Install Cowrie's dependencies.

sudo apt-get install python2.7 git virtualenv libmpfr-dev libssl-dev libmpc-dev libffi-dev build-essential libpython-dev python-pip

Add a new user named, cowrie.

sudo adduser --disabled-password cowrie

Switch to the new user, cowrie

sudo su - cowrie

Navigate to the home directory of user, cowrie, and clone the cowrie git repository.

git clone https://github.com/micheloosterhof/cowrie.git


Create a new virtual environment for cowrie.

cd cowrie

virtualenv cowrie-env

Activate the virtual environment.

source cowrie-env/bin/activate

The terminal will display "(cowrie-env)" before the username, cowrie.

Install pycrypto, Crypto and other requirements.

pip install pycrypto Crypto

(cowrie-env)$ pip install -r requirements.txt

Generate a DSA key for the cowrie instance.

cd data

ssh-keygen -t dsa -b 1024 -f ssh_host_dsa_key

cd ..

export PYTHONPATH=/home/cowrie/cowrie

Additional Cowrie Configuration

Make a copy of the config file for your new cowrie instance.

cd /home/cowrie/cowrie/

cp cowrie.cfg.dist cowrie.cfg

vi ./cowrie.cfg

Set the hostname in the configuration file to a server name of your choice. E.g. "fileserver4"


Change the "Port to listen for incoming SSH connections" to port 22.


Write your changes and quit vi.

Ctrl + C

:wq

Enable authbind in cowrie's start.sh file.

sudo vi /home/cowrie/cowrie/start.sh

Change line 2 to read:

AUTHBIND_ENABLED=yes


sudo apt-get install authbind

sudo touch /etc/authbind/byport/22
sudo chown cowrie /etc/authbind/byport/22
sudo chmod 777 /etc/authbind/byport/22

Start Cowrie

Execute the following commands to start Cowrie.

sudo su cowrie

cd /home/cowrie/cowrie/

source cowrie-env/bin/activate

./start.sh


Verify cowrie is listening on port 22 by running the command below.

netstat -tan

Active Internet connections (servers and established)
Proto Recv-Q Send-Q Local Address           Foreign Address         State
tcp        0      0 0.0.0.0:22              0.0.0.0:*               LISTEN


Execute the following command to stop Cowrie.

./stop.sh

How to Stop and Start the SSH Service (Running on the Custom Port You Chose Earlier)

If your server is accessible via a console in your cloud provider's management console, you may want to disable the SSH service on your server and enable it only when you need to establish a SSH connection to administer it.

This will prevent SSH brute force attacks against the listening service.

Execute the following command to stop the SSH service.

sudo /etc/init.d/ssh stop

Validate that the server is no longer listening on the custom SSH port. You should see that Cowrie is still listening on port 22.

netstat -tan

Execute the following command to start the SSH service.

sudo /etc/init.d/ssh start

Test Connectivity to the Cowrie Honeypot

Connect to your server on port 22, enter any password and you will be authenticated successfully.

Execute some commands for Cowrie to log.


Review the Cowrie Log File

Connect to your server (not the Cowrie instance) and review the log file.

cat /home/cowrie/cowrie/log/cowrie.log | less

The attacker's IP address will be shown in the red areas in the image below.


I will be writing a post soon on how to visualize the attacks against your honeypot using Splunk.

Sunday, September 11, 2016

Detecting Lateral Movement Using Sysmon and Splunk

Detecting an attacker moving laterally in your environment can be tough. It can be difficult to obtain the necessary logs to identify this activity and differentiate between what is normal and what is malicious.

This post highlights a few things that you can look out for that could identify an attacker moving between hosts. With sysmon installed on Windows hosts and the events being sent to SIEM, you can detect attempts to move laterally and questions during incident response can be answered in minutes versus hours.

Install and Configure Sysmon on a Windows Host

Download sysmon and install it on the Windows host as follows.

sysmon -i -n


You can view sysmon events locally by opening Event Viewer and navigating to Microsoft  - Windows - Sysmon - Operational. You can see that Sysmon logged the creation of a new process, powershell.exe, in the image below.


Add the following text to the inputs.conf file.

[WinEventLog://Microsoft-Windows-Sysmon/Operational]
disabled = false
renderXml = true


Sysmon events from the host can now be found in Splunk under sourcetype="XmlWinEventLog:Microsoft-Windows-Sysmon/Operational"


Install the Splunk "Add-on for Microsoft Sysmon"

Download the add-on from the following location:


Unzip the contents of the compressed file to following folder on the Splunk server:

C:\Program Files\Splunk\etc\apps


Restart Splunk Light.

Events in sourcetype="XmlWinEventLog:Microsoft-Windows-Sysmon/Operational" should now be parsed into the appropriate fields.


Sysmon Event Codes

In the examples below, we are interested in the following sysmon event IDs:

Event ID 1: Process creation
Event ID 3: Network connection

Refer to the official sysmon page for further details on the various Event Codes.


Detecting an Attacker Establishing SMB Sessions to Move Laterally

Attacker uses the following command or similar to establish a session to the victim.

net use \\192.168.1.88


Search sysmon events in Splunk to identify the suspicious SMB (Port 445) session established between the two Windows hosts. See the search string below.

sourcetype="XmlWinEventLog:Microsoft-Windows-Sysmon/Operational" 192.168.1.90 445 | table _time, EventCode, EventDescription, host, SourceIp, src_port, User, DestinationIp, DestinationPort, Image, ProcessID, Protocol


Run the following command on the victim to view the established SMB session to the attacker.

netstat nao | find "ESTABLISHED"


Is it normal for a SMB session to be established between these two hosts? Analyze events in your environment, understand what is normal in terms of process creation/termination and network connections established between hosts, and have your analysts investigate and identify abnormal activity.

Detecting an Attacker Using PowerShell to Move Laterally

Windows RemoteManagement (WinRM) traffic initiated via PowerShell will traverse ports 5985 and 5986.

In this example, the attacker executes the commands below to remotely execute scripts on the victim or establish a connection to the victim.


In Splunk, we can see the following sysmon events to identify the suspicious activity.

We can see WinRM traffic from the attacker to the victim over port 5985.

sourcetype="XmlWinEventLog:Microsoft-Windows-Sysmon/Operational" 5985 OR 5986 | table _time, EventCode, EventDescription, host, SourceIp, src_port, User, DestinationIp, DestinationPort, Image, ProcessID, Protocol


We can see the WinRM Remote PowerShell process (wsmprovhost.exe) on the victim start the ping.exe and systeminfo.exe processes. We can also see the strings entered on the command line. Would this behavior be normal in your environment?

sourcetype="XmlWinEventLog:Microsoft-Windows-Sysmon/Operational" wsmprovhost.exe | table _time, EventCode, EventDescription, host, Image, ProcessID, ParentProcessId, CommandLine


It is possible that the above activity happens often in your environment, which can make it challenging to differentiate between expected and malicious activity. Attackers will use tools that are native to the OS in the hope that their activities go unnoticed. It is important to be familiar with what's normal in your environment and monitor for behavior that is out of the ordinary.

Saturday, September 10, 2016

Mounting a BitLocker Encrypted Image Using Dislocker

Sometimes it is necessary to boot a host into an alternate OS to acquire a raw disk image. If you need to mount the image for forensic analysis in Linux, this can present a problem if the disk was encrypted using Microsoft's BitLocker.

If you have the BitLocker recovery key, you can mount the image in Linux using Dislocker as follows. These steps were executed on an Ubuntu 14.04 LTS system.

Install Dislocker

Install Dislocker's dependencies.

aptitude install gcc cmake make libfuse-dev libpolarssl-dev ruby-dev

Clone the Dislocker Git repository.

git clone https://github.com/Aorimn/dislocker.git

Navigate to the dislocker directory you just created.

cd dislocker

Make and install the binaries on your system.

cmake .
make
sudo make install

output of 'man dislocker' command

Mount the Image

Create a temp directory where you will mount the image.

mkdir /mnt/dislocker

Read the encrypted raw image using dislocker.

dislocker -v -V /media/images/myimage.bin -p<BITLOCKER-RECOVERY-KEY>  /mnt/dislocker

Further details about the above command.

-v - Increase verbosity (CRITICAL errors are displayed by default)

-V - Volume to get metadata and keys from

​/media/images/myimage.bin - Path and file name of encrypted image

-p<BITLOCKER-RECOVERY-KEY> - BitLocker recovery key to unencrypt image. Replace <BITLOCKER-RECOVERY-KEY> with actual recovery key

/mnt/dislocker - Path to load dislocker file, which will be mounted later
Create a folder to mount the image.

mkdir /tmp/temp/

Mount the dislocker file as read only to the /mnt/temp directory

mount -o loop,ro /mnt/dislocker/dislocker-file /mnt/temp

Further details about the above command.

-o loop,ro - Mount the filesystem using the loopback device. Mount as read-only

/mnt/dislocker/dislocker-file - Path and file name of unencrypted dislocker file

/mnt/temp - Path to mount the unencrypted image as a drive

The unencrypted image is mounted under /mnt/temp

List the contents of the mounted image.

ls /mnt/temp

Acquire an Image of the Mounted Disk in an Unencrypted State

You may want to take another image of the mounted image in its unencrypted state. This can be useful if you need to load the image into a forensic tool for analysis.

You can use ddrescue to take a raw image of the mounted image as follows.

ddrescue -v /mnt/temp/dislocker-file /media/images/my_unencrypted_image.bin

Further details about the above command.

-v - Verbose logging

/mnt/temp/dislocker-file - Location of file you want to image in unencrypted state

/media/images/my_unencrypted_image.bin - Location to save new image file